


Choose the units of a widget
Pick which units a widget shows from the tree of your units. The widget updates as soon as the list closes.
Before you start
You need:
- Access to the Dashboard (Dashboard in the side menu)
- A widget on your Dashboard
New to the app? Start with Sign in to the web app.
When to use it
When a widget should show only some units instead of all of them.
Step by step
-
Step 1: Click the units chip to choose which units the widget shows
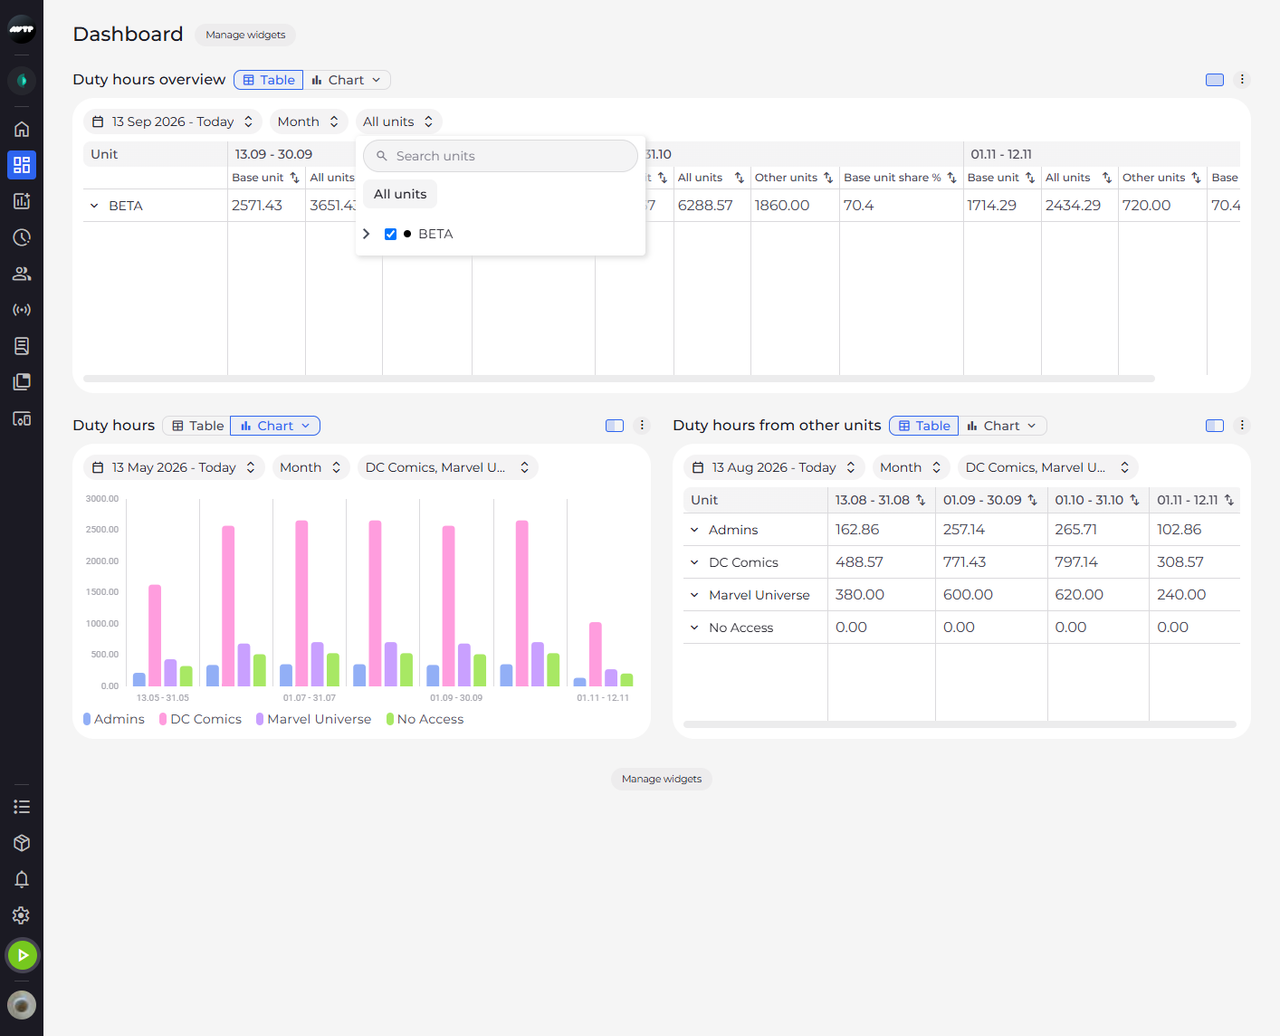
Click the units chip of the widget - the third chip. A list opens with a search box, an All units button and the tree of your units, where the units the widget shows are ticked.
Tip: Type part of a name in Search units to filter the tree - it shows the matching units together with the units above them. The search is cleared each time you open the list.
Tip: All units ticks every unit. When every unit is already ticked, it clears them all.
-
Step 2: Tick the units you want - a unit includes its sub-units
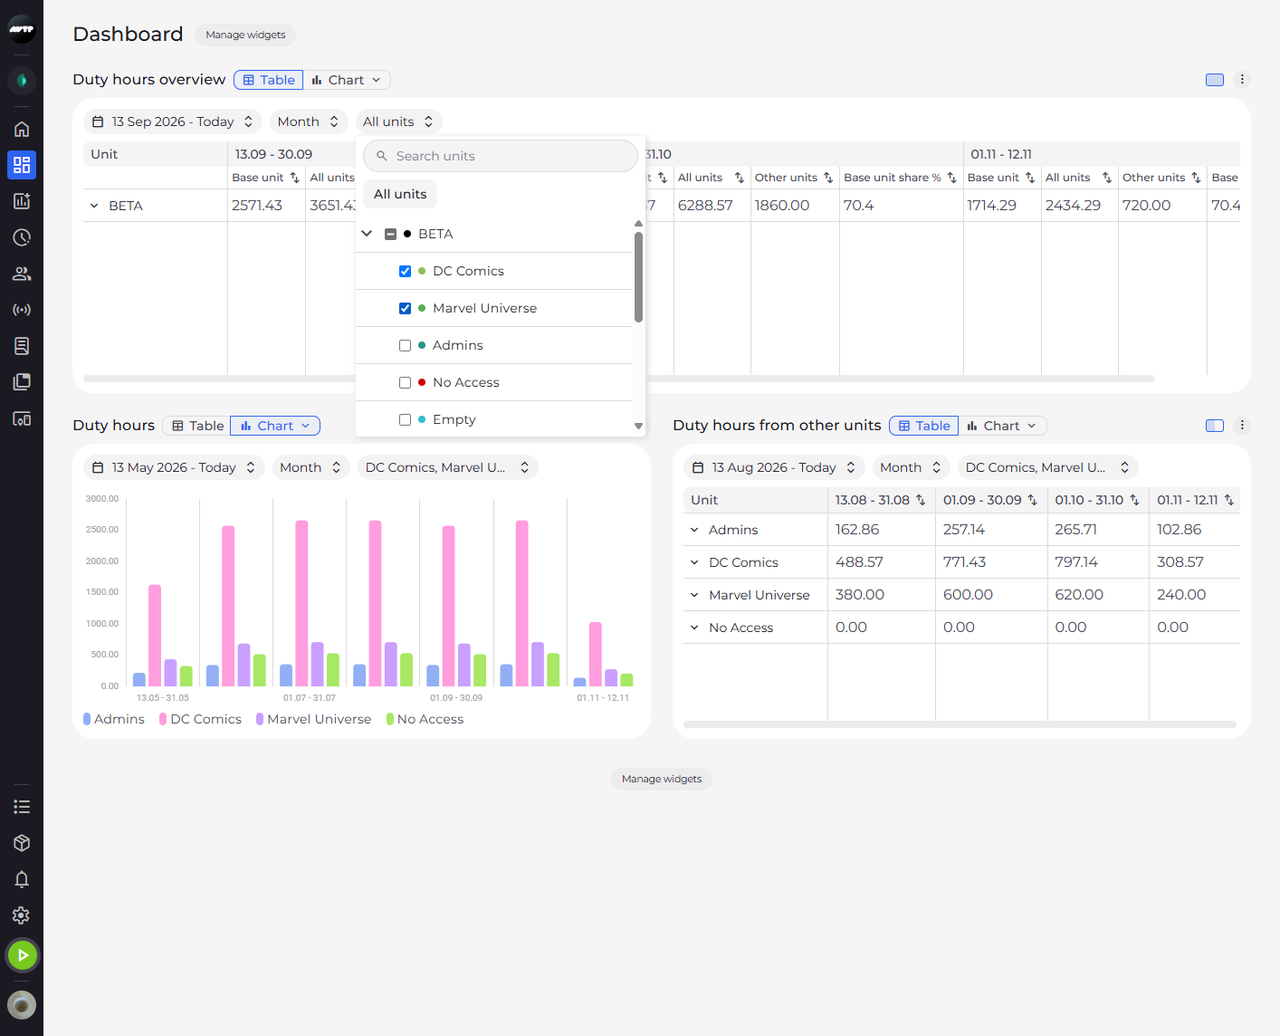
Click the box of the main unit to clear it, then click the arrow next to it to see its sub-units. Tick each unit the widget should show.
Tip: Ticking a unit ticks all its sub-units, and clearing it clears them. A half-filled box marks a unit where only some sub-units are ticked.
-
Step 3: The widget shows the chosen units
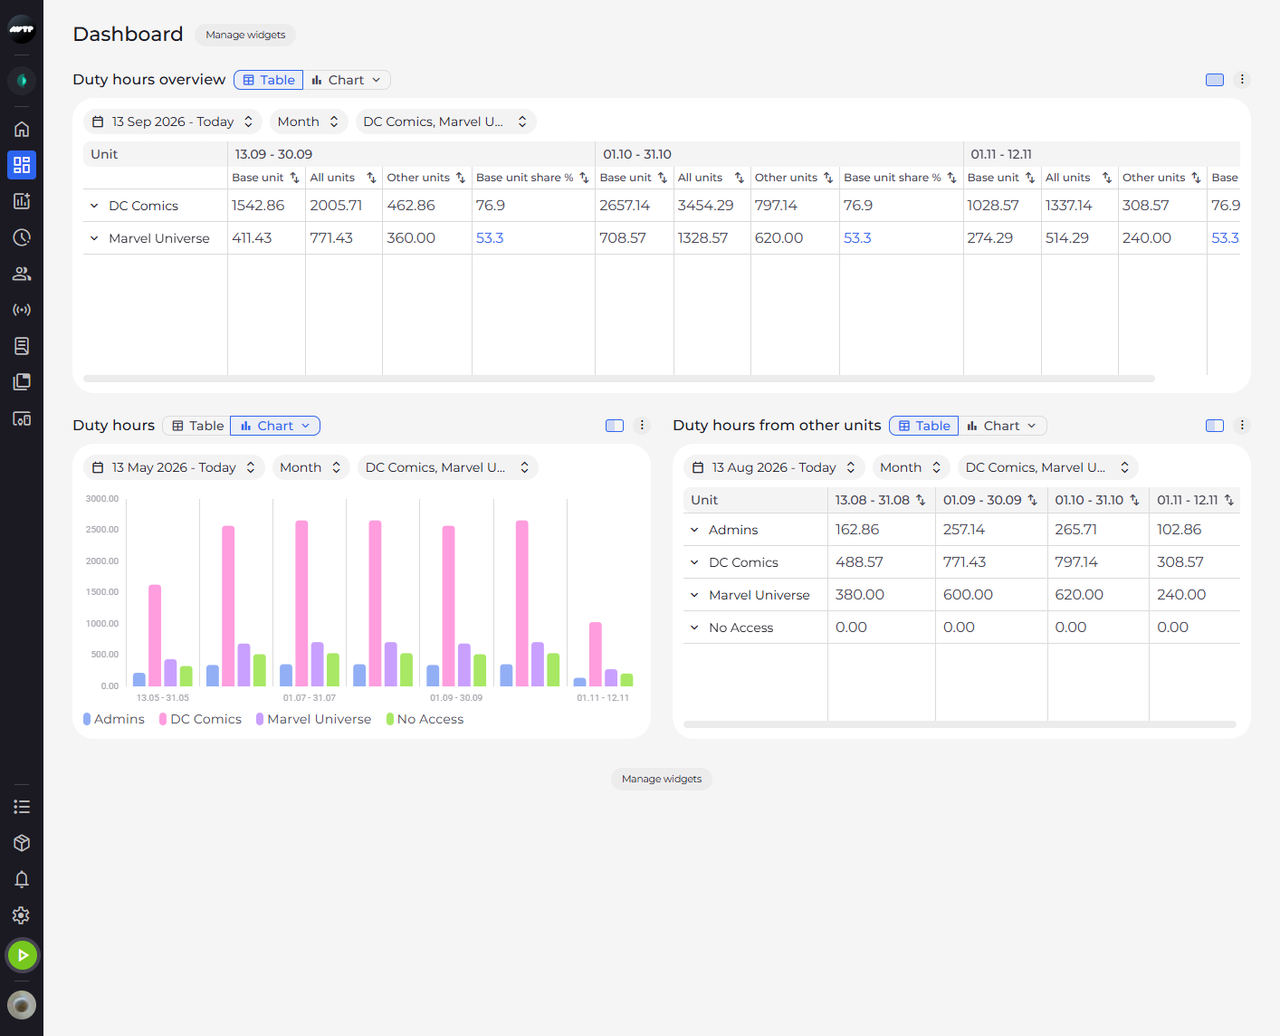
Click the Dashboard title at the top of the page to close the list. The table now has one row for each unit you ticked, and the chip names them.
Tip: The selection applies when the list closes - click anywhere outside it. If nothing is ticked when it closes, the widget keeps its previous units.
Tip: The chip names the first two units and adds +N for the rest. It says All units when every unit is ticked.
What happens next
The widget shows the data of the units you ticked. The selection is saved with the widget, so it stays the next time you open the Dashboard.
Good to know
- If the units of a widget were deleted, it says "Select units to see the data of this widget." Click Select units and choose others.