


Create a dashboard list
Create a list of indicators in Settings > Dashboard lists. Each list is a widget the Dashboard can show, and its indicators become the widget's columns.
Before you start
You need:
- Access to Dashboard lists in Settings (under More)
- The right to change dashboard lists - without it there is no New button
- At least one indicator in Settings > Indicators - a list can only show indicators
New to the app? Start with Sign in to the web app.
When to use it
When the Dashboard should show indicators, or a calculation with them, that no existing list has.
Step by step
-
Step 1: Dashboard lists are the widgets your Dashboard can show
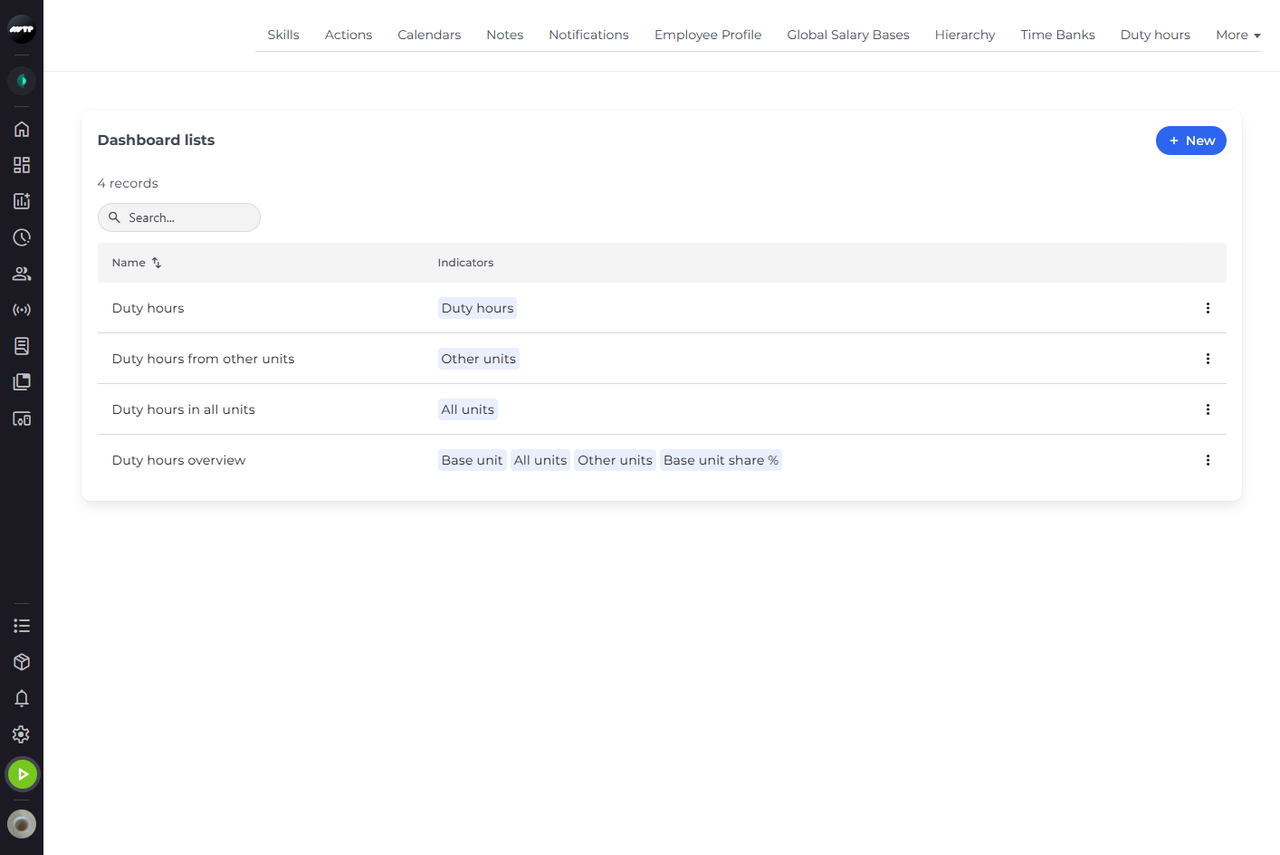
In the side menu on the left, click the gear icon near the bottom to open Settings. Point at More at the right end of the tabs and click Dashboard lists. The table shows every list with its indicators.
-
Step 2: Name the column and pick the indicator it shows
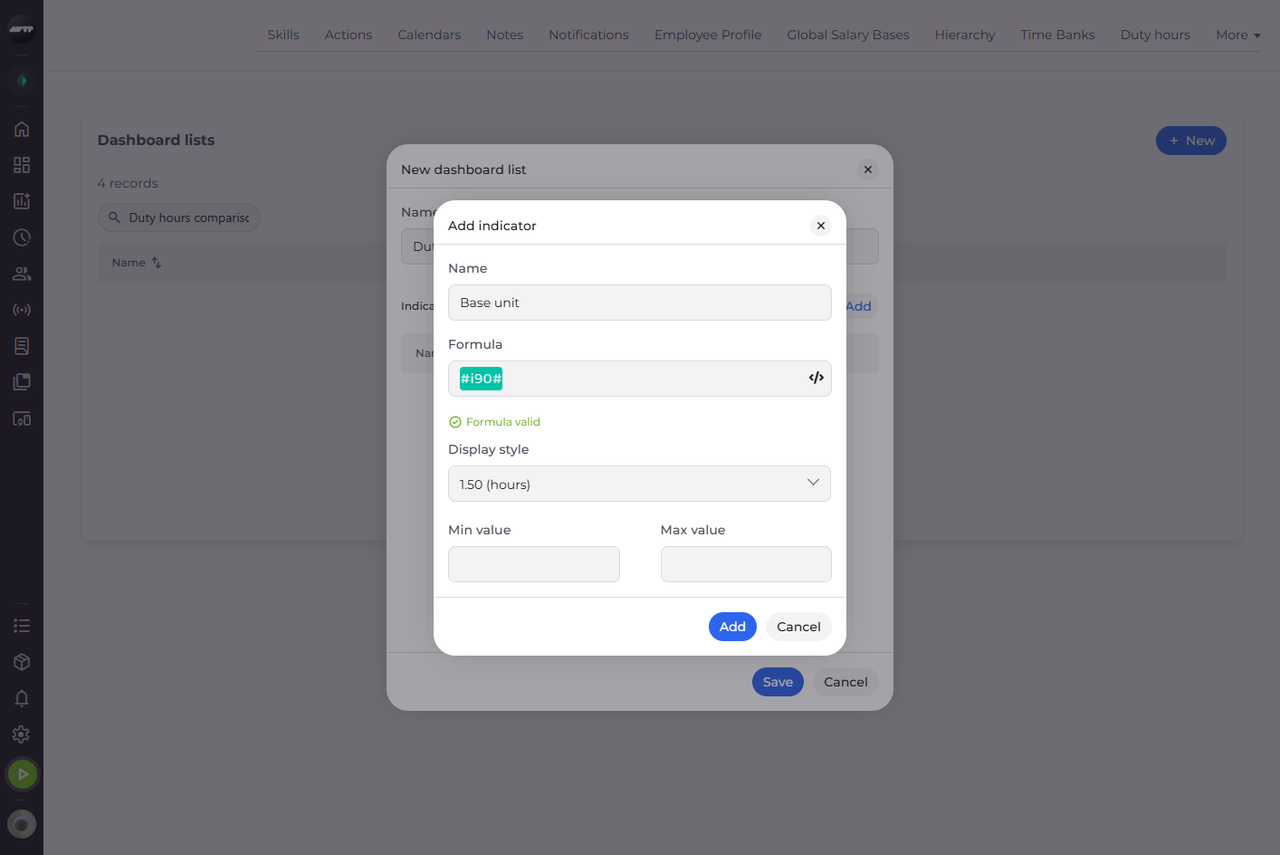
Click New. In New dashboard list, type a Name for the list, for example "Duty hours comparison", and click Add next to Indicators. In Add indicator, type the column's Name and pick the indicator it shows in Formula - the indicator appears in the formula as a highlighted code.
Tip: Click in Formula to list the indicators, or type part of an indicator's name to narrow the list. Click one, or move to it with the arrow keys and press Enter, to put it into the formula.
Tip: The formula is checked as you type: "Formula valid" appears under it, or a red message that says what is wrong, such as "The formula is not valid." Fix it before you click Add - otherwise Save refuses the list.
-
Step 3: Combine indicators in a formula and mark values below Min or above Max
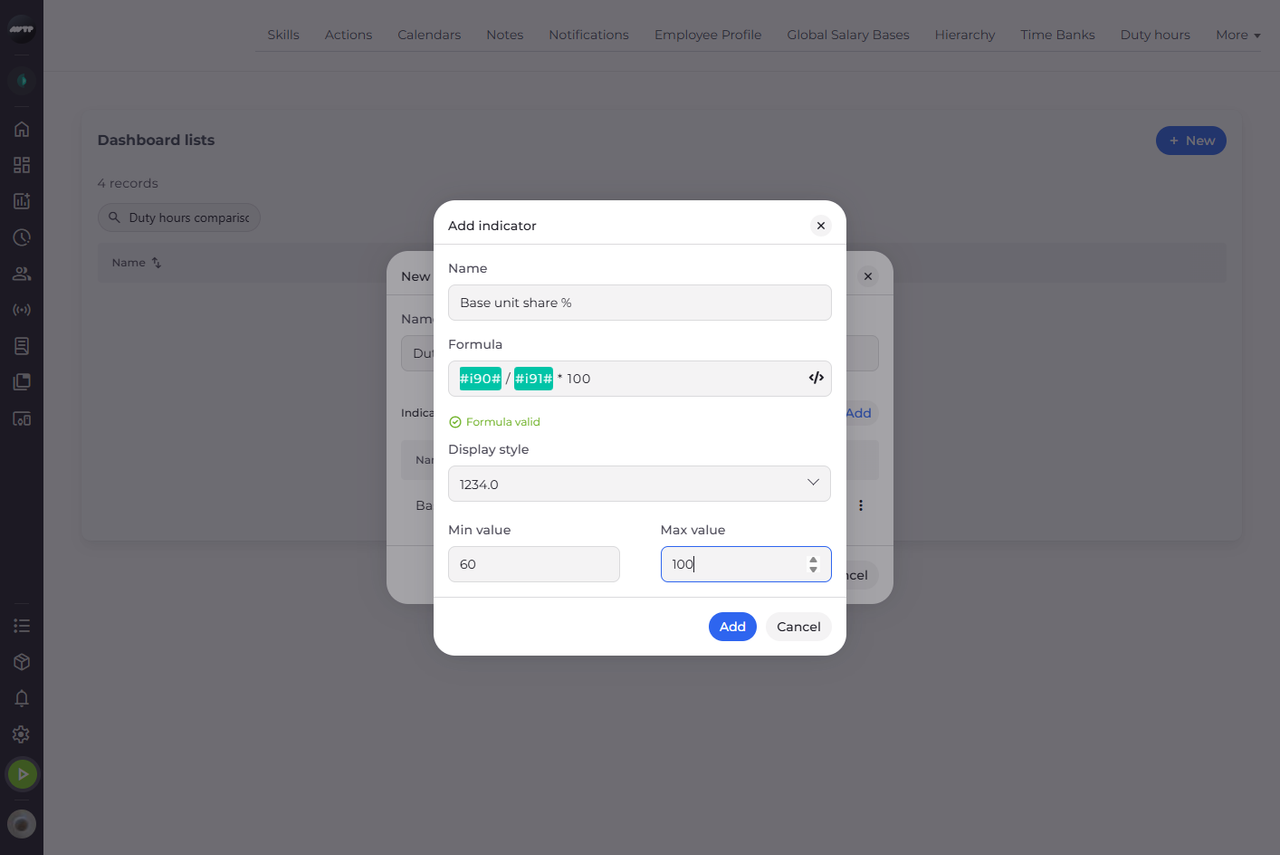
Click Add to keep the column, then click Add next to Indicators again for the next one. For a calculated column, combine indicators in Formula with
+,-,*,/and numbers, for example one indicator divided by another, times 100. Choose how the values look in Display style and, if you like, type a Min value and a Max value.Tip: Min value and Max value are optional - leave one empty for no limit. With 1.50 (hours) you type hours as a decimal (7.5 for 7 h 30 min), with HH:mm or HH:mm:ss a duration in the format the field shows, and with the other styles a plain number.
Tip: While Min value is above Max value, the dialog says "Min value cannot be greater than max value." and Add does nothing. Add also needs a Name and a Formula - otherwise you see "Name is required." or "Formula is required."
-
Step 4: The list's indicators become its columns
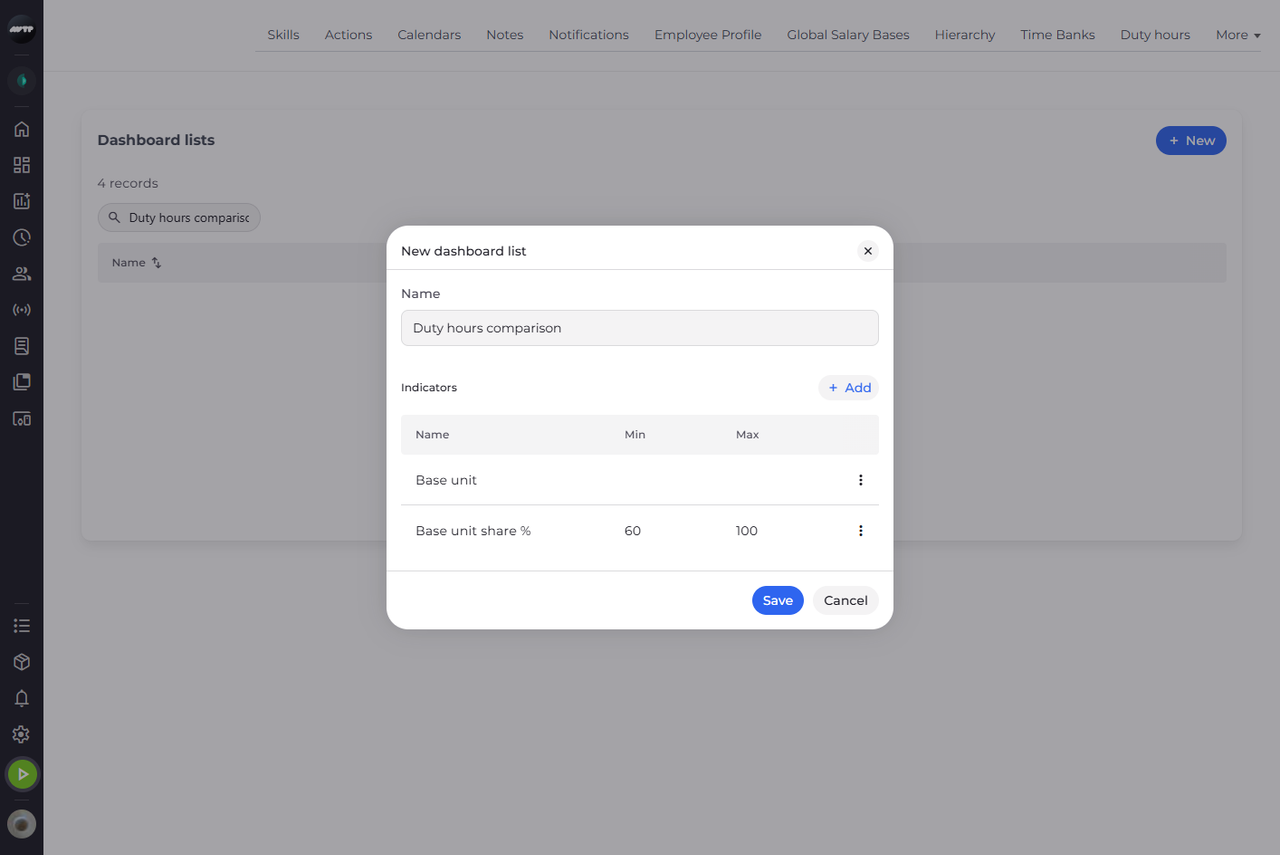
Click Add. The Indicators table of New dashboard list now holds both columns, each with its Min and Max - empty where you set no limit.
-
Step 5: The new list is ready - add it to your Dashboard with Manage widgets
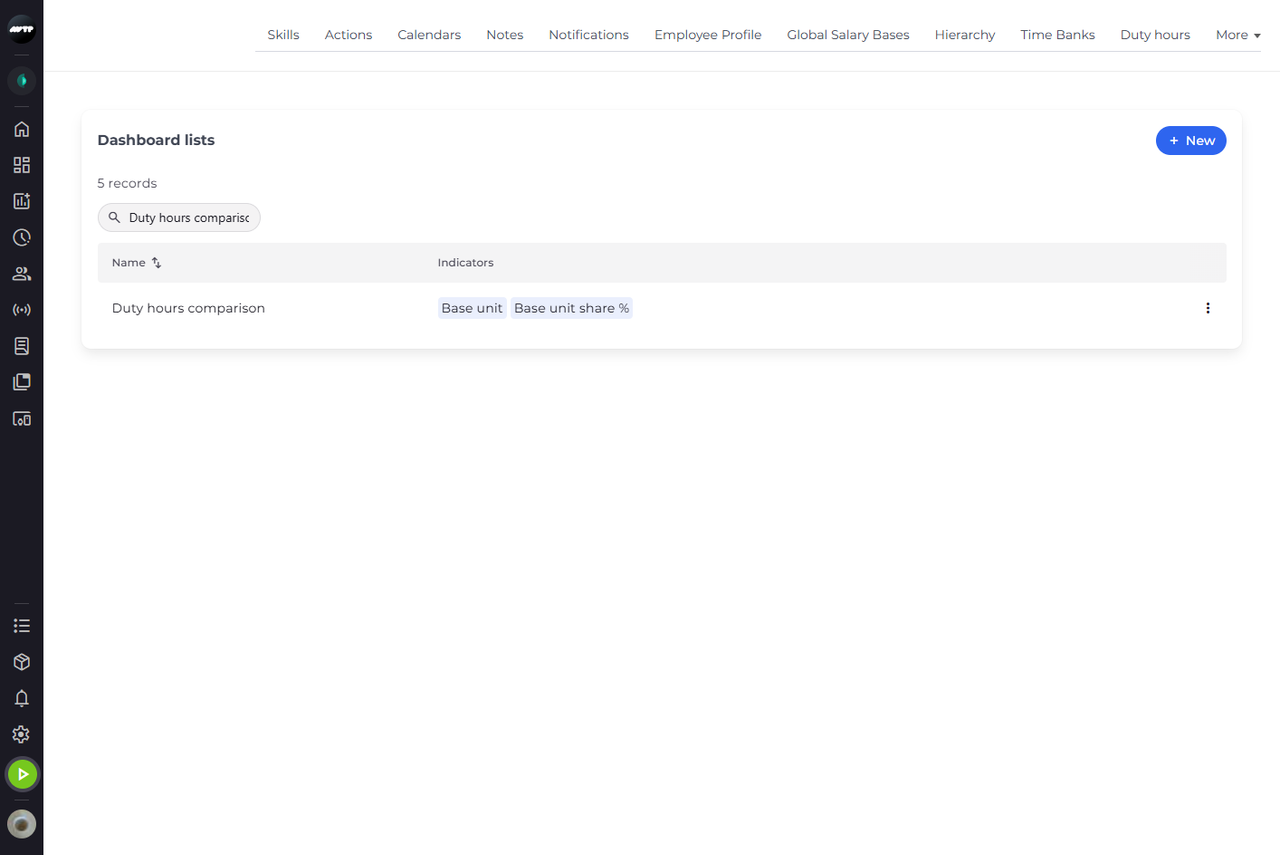
Click Save. The dialog closes and the new list is in the table with its indicators. To show it on your Dashboard, click Manage widgets there and click the list under Hidden:.
What happens next
The new list is saved in Dashboard lists and can be added as a widget to the Dashboard, with one column per indicator.
Good to know
- On the Dashboard, a widget's table shows a value above Max value in red and one below Min value in blue. Point at the value to read "Above the maximum" or "Below the minimum".
Questions
Why does Save not close the dialog?
The list needs a Name of up to 50 characters, and a name of only spaces counts as empty. Until you type one, the dialog says "Name is required."